

Get In Touch
On picking apples:
With so many apple varieties out there, it can be tough to figure out which ones are best for pie making. Generally speaking, stick to apples that are crisp, sweet and tart. For one, you want your apples to remain somewhat firm after baking (ie: not turn to applesauce). You also want them to stay tasty after they’ve been cooked, and with a flavour that can hold up to the cinnamon and nutmeg ingredients.
This becomes easier over time —you’ll naturally learn how to work with your apples by adjusting your cinnamon, nutmeg and sugar. For example, when I made my rustic apple pie, I used wild apples straight from our tree in the country. Slightly more firm and tart than average, I added a touch more sugar and cinnamon than the recipe called for to offset the flavour of the apple. Since you probably won’t be using wild apples, check out this excellent pictogram from Lexi’s Clean Kitchen on cooking with different types of apples.
On pre-cooking apples:
Cooking your apples before placing them in the pie and into the oven is part science, part opinion. Personally, I prefer to cook the them on low in a big pot over the oven before letting them cool and pouring them into the pie crust. Some may say that cooking in a pot doesn’t allow for even cooking (the heat comes from the bottom) but as long as the pot is large enough and the heat soft, there shouldn’t be an issue. To work around this, others suggest boiling the apples to soften them (I haven’t tried this method). You can also choose to cook them directly in the oven without pre-cooking—this works too, depending on the texture of your apples or if you like a firmer apple filling.
On making the dough:
Combine flour, a bit of salt and sugar, butter (or shortening) with ice cold water and voila! Pie dough. While the ingredients are simple, the challenge lies in the way the butter interacts with the flour and water. Interestingly, the chemistry behind pie crust flakiness had to do with the creation of tiny pockets of butter enclosed by flour. The rolling pin flattens them and stretches them out so that once in the oven, the butter melts, making those deliciously crispy layers we oh-so-desire.
Don’t mix, or cut, the butter into the flour enough and it’ll be leathery, the result of having to add extra water to absorb the excess flour. Cut it too much and it’ll become dry. Other than practice, here are some tips to get it right:
- For best results, your butter should be straight out of the freezer and left out to softened some so that you can work with it.
- Your water needs to be ice cold, too – and I mean this literally. To do this, take a glass of water and drop in several ice cubes before using it.
- Grate your butter before incorporating the dry ingredients and put it back in the freezer for five to ten minutes, or until you’re ready to work with it.
- Keep it old school and use your hands and a spatula to mix the ingredients. It makes it difficult to over cut your dough this way. My preferred method.
Place your dough back in the fridge for one to two hours before use.
To give your crust a nice golden brown colour, coating it with eggs is the way to go. I prefer to use egg whites sprinkled with white sugar, but there are other options, too!
For a more in-depth look on the science behind homemade pie dough, check out this post by The Food Lab.
On using a rolling pin:
Make sure you have enough space!
For those of you who don’t have a rolling pin (yet!), grab a bottle of wine and cover it in saran wrap to prevent the label from causing any issues. If it’s empty, be sure to block the top with a cork or a napkin. You don’t want to stain your crust with wine. I speak from experience.
For the bottom of your pie, your dough should be about three inches longer than the size of your pan. It should half an inch to an inch longer for the top.
Once you’re ready to roll, be sure to sprinkle your workstation with flour so the dough doesn’t stick. Don’t worry about adding too much flour, it won’t affect your dough.
If it does happen to get stuck, don’t worry and get out a flat metal tool, like a spatula, to gently lift your dough from the edges.
Don’t worry about getting it ready on your first attempt, it might take twenty-plus rolls before it’s ready.
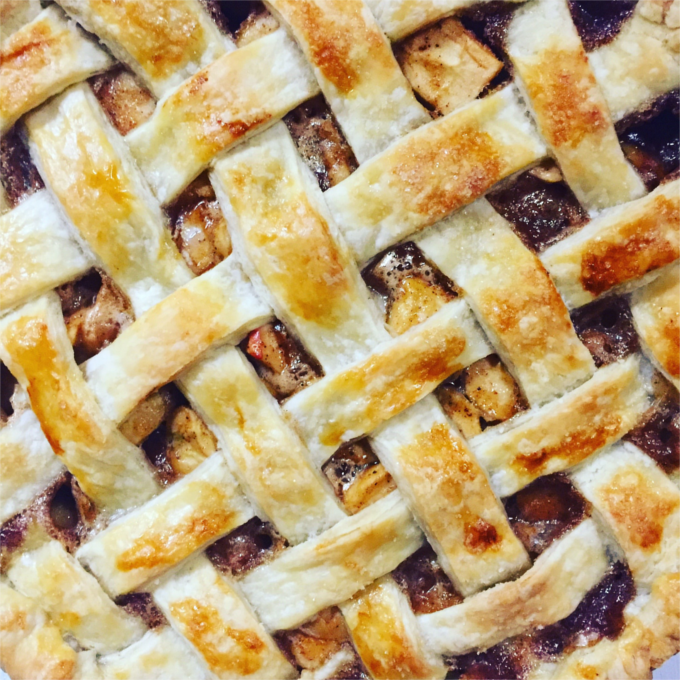
On making a lattice pie crust:
This looks way harder than it actually is. At first, I was intimidated, then I poked around on the internet and came across this really helpful site at Simply Recipes which made it so easy to do with step-by-step instructions and photos.
There’s nothing quite like making your own pie from scratch. It’s a lot of fun and a great way to get together in the kitchen. If you have any questions or comments, please reach out in the comment section below.
Happy pie-making!
xx

Wow! This looks amazing! Can’t wait to read more of your posts!!
Thanks, Julia! Glad you like it and thanks for stopping by!
xx Day.